Road: Everybody loves legs day.
If you need to get to part D then parts A.B&C also need to come off and now you can reach part E more easily. Sod it lets just do the alphabet whilst we are here!
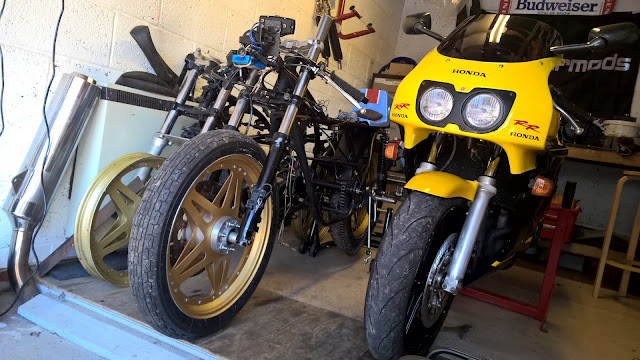
 The CBR had shown that it really needed new tyres in a recent "moment" so the wheels needed to come off.
Seeing as the wheels were going to be off I might as well get that powder coating done whilst I am there.
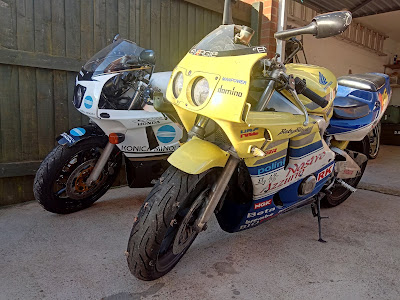
The NSR250 MC28 also needed its wheels powder coating and some fresh shoes wouldn't be a bad idea either. Might as well get them done together eh?
 Tyres were bought off of eBay in the form of a set of Bridgestone battleaxe S20 EVO's for the NSR and Metzeler M3 front and M1 rear for the CBR. This cut the costs right back which was good as this was going to be a very expensive month for me.
I took the bare wheels to Viking powder coating near Bardney Lincolnshire who did a fairly good job. At £50 a wheel I expected a touch better, but the price was still good and so far the coating has stayed on the rims just suffering around the hub a little whilst fitting new bearings.
This rather interesting little screw on the right had been chamfered down to fit in the tight space available for the rear disc. In doing so the previous owner had removed nearly all of the socket for the spline drive making removal a right pain. On the plus side all of the rear disc bolts had been done up by a three year old so didn't require much wrenching which is fine as the consequence of them coming loose isn't big at all....

On to the shops I went and ordered a pair of EBC PRO-LITE discs and HH sintered pads, a caliper seal kit, Wezmoto braided lines, and a set of fork seals with all of the fluids needed to make this all work.
Did I mention this was going to be an expensive month?
Off came the forks, brakes, top and bottom yolk.
Well when in Rome.
All of the time I was doing this I was replacing fasterners in the fairings and anywhere else I found random bolts stuck in which was pretty much everywhere.
Due to the shocking price or replacement rear disk bolts I went and ordered some titanium bolts as they were the same price! A fairly well priced fairing fastener kit was providing dome screw and a bag of well nuts was replacing nuts, washers and bits of coke can.
I was also able to get at fiddly bits of the bike for a good clean with chemical wipes.
These are the more basic damper rod type and the break down in the Haynes manual is very helpful if you get lost during assembly.
 All parts were cleaned out to ensure the apertures for the damping didn't become clogged with stuff like that gunge on my finger after I added new oil.
A fresh set of HRC fork seals and a bit of hammer time later and things were back together.
Being the knob that I am I managed to run out of fork oil so engine oil of roughly the right viscosity was used to get the thing on the track. This was far from ideal but it did the job. If I'm honest I didn't notice any problems from the front end at all in fact!

Whilst I had the top yolk off I decided to take off that tacky "carbon look" cover.
I was hoping a little polish up would do as I quite like the brushed Ally look top yolk on these bikes.

Oh dear. Well I had noticed the top yolk was a touch tight to get off and it was evidently tricky to fit as well. Clearly someone had used a ball peen hammer and a BB gun to fit this the last time and the surface showed it.
Never mind, adapt and over come and all that...

I used body filler to fill in the damage, sanding back and refilling as required.
I didn't want to kick the ass out of this though as this is just a track bike afterall!.


I masked off the Honda logo and got painting.
First a liberal primer coat was used to fill in some imperfections and smooth things out a bit.
Finally a light then wet coat of mat black paint was applied to go with the more modern powder coated finish we have gotten used to on Honda's.
The finished job wasn't perfect but was a damn sight better than when I started!

Then there is that little job of the brakes.
First of all I stripped everything down to the individual part. Then I rebuilt it all and bled it when I remembered I needed to pump out the pistons. Dummy.
Pumping out sticky pistons is a bit of an arse pain but by sticking pads between the good ones to coax out the less cooperative pistons does the job.
One nice thing about the two pot sliding calipers is less pistons to sort out. a short while later everything was cleaned up and new seals fitted.
Seeing as I had them off and the day was getting on a bit; I repainted the calipers with some Kia titanium silver paint which looks pretty smart.

I let the paint dry over night and assembled the brakes with the new lines and the EBC HH sintered pads. I always cover the pin and backs of the pads with copper slip. This not only protects the metal and aids movement but also helps with thermal conductivity.

Next up the EBC SUPER-LITE discs needed to go on the wheels which would prove to be an adventure as ever.


First off the discs were set far too wide on the hub. I checked the discs were the right offset, which they were and made sure I hadn't buggered up the spacers or not set the bearings fully.
Then I figured out the powder coating was too thick and needed removing from the disc mating surfaces.
This was achieved with a dremel and files.
All seemed well till I spun the front wheel to see the right disc was very warped. Had I done it whilst fitting? was the disc damaged in transit?
I took it off and set it flat. perfect but how?
I refitted it and yet again it was bent.
It was only after some experimenting with loosening bolts that I spotted one bolt hole was set lower than the rest. To rectify this all of the others were profiled down to the same heightwich thankfully didn't ruin the offset.
All done, tightend, blead etc ready to go play on the track.
Naturally it was a wet day but good training for wet riding for some of the RAFMSA team members. This was exasperated somewhat by the rear tyre I had fitted being shockingly bad making the bike feel like a moto GP bike rather than a little 400 fun machine. It only improved my throttle care in the wet though and didn't spoil what was otherwise a good learning experience. Apparently I was fun to follow according to my instructor so I'm glad he enjoyed watching me repeatedly shit myself on the exit to every other corner.
A new Metzeler M5 is sat ready to fit to replace that "bargain" M1. Are bargains even a thing?


Comments
Post a Comment